|
|
 |
| Instructions |
Illustrations |
| 1. Disconnect power
to the washer (or unplug it). Turn off both hot and cold water lines at the wall
shut off valve. |
 |
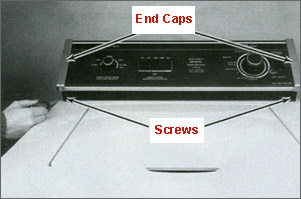
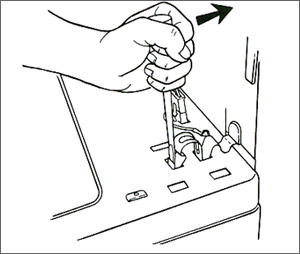
| 2. Using a phillips
screwdriver, remove the screw from the front of each end cap, directly
under the console. |
 |
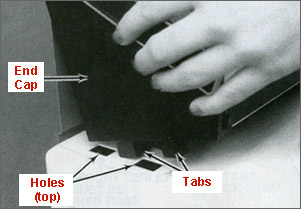
| 3. Pull the console
forward and up to remove the tabs on the bottom of the end caps, out of
the holes in the top panel. |
 |
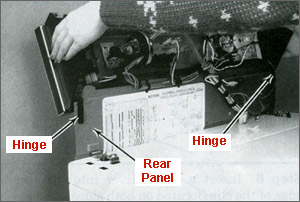
| 4. Lift the console
up, flip it over and lay it back until it rests on the hinges. |
 |
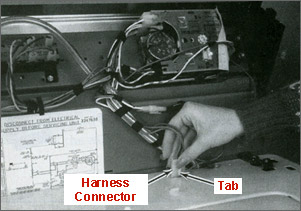
| 5. Disconnect the
harness plug. |
 |
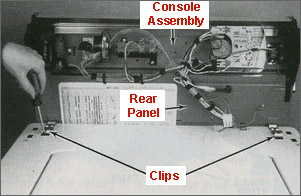
| 6. Now we're going
to detach the cabinet from the back panel. Insert a flathead screwdriver
into the turned-up edge of the clip (located on both sides), and pry back.
This removes the clip from the hole in the cabinet. Do the same with the
clip on the other side. |
 |
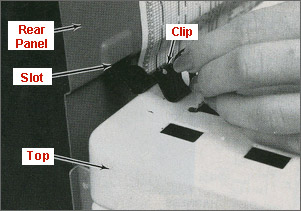
| 7. Slide the other
end of the clip down and out the slot in the rear panel. Do the same with
the clip on the other side. |
 |
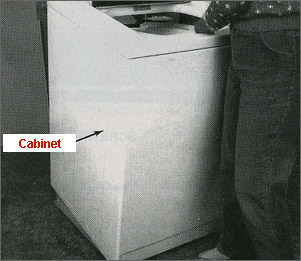
8. Open and hold
the lid while grabbing the cabinet front opening.
Note: Be sure when tilting the cabinet that the back edge clears
the vacuum break. |
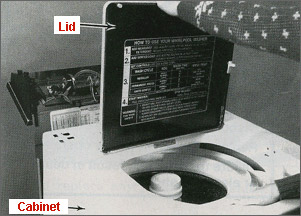 |
9. Tilt the top of
the cabinet toward you by pulling on the lid and opening of the cabinet.
This releases the back slots of the cabinet from the tabs in the back of
the base.
Note: Be careful when moving the cabinet, as it could fall and
injure your toes.
Using the side of your leg and/or body as a support for the front of the
cabinet, carefully lift while pulling it away from the base of the washer.
This releases the front slots of the cabinet from the tabs in the front of
the base.
Set the cabinet aside and close the lid. |
 |
|
Click here for Part 2
(Re-installing the cabinet) |
|
|